Introduction: Trust Signal or Revenue Killer?
Every Shopify store needs a "Contact" page. It's often the second thing a visitor looks at after viewing a product. It signals: "There are real people behind this. If I have a problem, I'll get help." A missing or hidden contact form is one of the fastest ways to lose potential buyers' trust.
However, in 2025, the role of the Shopify contact page has drastically changed. While most merchants view the form merely as a digital mailbox, market leaders recognize a critical problem: The classic form is a dead end for sales conversations.
When a customer asks: "Does this spare part fit my machine?" and has to fill out a form, they enter the "waiting trap." They wait 24 to 48 hours for an email response. By that time, they've long since ordered the product from Amazon, where the answer (or delivery) was faster. According to rep.ai, the average response time to web leads is a staggering 47 hours—acceptable for support inquiries, but fatal for purchase-ready customers.
In this comprehensive guide, you'll learn not only how to technically set up and customize a Shopify contact form (including GDPR tips for European markets), but also why you need a faster alternative for pre-sales inquiries. Understanding AI customer service basics becomes essential when you realize that static forms simply can't keep pace with modern buyer expectations.
Part 1: Create a Standard Shopify Contact Page (5 Min)
Before we dive into advanced strategies, we need to establish the basics. Shopify makes it very easy to provide a rudimentary form. This is the first step for every new store.
Step-by-Step Instructions
The setup takes place directly in the Shopify admin area and requires absolutely no programming knowledge. Follow these simple steps to get your basic contact form up and running.
- Create a Page: Go to your Shopify admin area under Online Store > Pages. Click the Add page button in the top right corner.
- Title and Content: Give the page a clear title, such as "Contact," "Help & Support," or "Customer Service." In the content field, you can add text that will be displayed above the form. Pro Tip: Use this space for expectation management. Write something like: "We typically respond within 24 hours. For urgent questions, please check our FAQ."
- Assign the Template (The Most Important Step): On the right side (desktop) or bottom (mobile), you'll find the Online Store section. Look for the dropdown menu Theme template. Select contact here. Note: If you don't select this template, only your text will be displayed, but no form.
- Save and Link: Click Save. Don't forget to link the page in your navigation (main menu or footer) under Online Store > Navigation.

What Can the Standard Form Do?
The native Shopify form is minimalistic. According to Shopify's official documentation, it contains the following standard fields: Name, Email, Phone Number, and Message. All inquiries are sent to the email address you've stored in your Shopify settings under Settings > Notifications > Sender email.
Part 2: Advanced – Customize Fields & Use Apps
The standard form is sufficient for simple messages ("Where's my package?"). But what if you want to process a complaint and the customer needs to upload a photo? Or if you want to mandatorily request the order number? This is where the standard reaches its limits.
You have two options: Using apps (simple, but paid/slower) or customizing the code (free, requires caution). Both approaches have their merits depending on your technical comfort level and specific requirements.
Option A: Best Shopify Contact Form Apps (No-Code)
For merchants who need drag-and-drop functionality, apps are the standard approach. Based on current ratings and features, these are the top recommendations for various market needs.
1. HulkApps Form Builder
A very popular builder that allows deep customizations. Advantages: File uploads, conditional logic (e.g., "Show field X only if customer selects Y"), Google reCAPTCHA integration against spam. Disadvantages: The free version is limited; additional scripts can minimally increase the load time of the contact page. As noted by aeroapps.io, this remains one of the most feature-rich options available.
2. Pify Form Builder
Pify has established itself as a strong alternative, especially due to its many templates. Advantages: Offers templates for wholesale inquiries, returns, and contact. Integrations with Mailchimp and Klaviyo are possible to bring inquirers directly into email marketing (Caution: observe GDPR!). Disadvantages: The design often needs to be manually adjusted to match the theme so it doesn't look "tacked on." Avada.io provides comprehensive comparisons of these form builder options.
3. Qikify Contact Form
Ideal for beginners looking for a modern design. Advantages: Very intuitive editor, bubble forms (floating in the bottom right) possible. According to getmesa.com, this option works particularly well for stores prioritizing user experience.
Option B: Add Custom Fields via Liquid Code
If you don't want to pay a monthly fee for an app, you can add fields manually. Shopify uses the templating language Liquid. As explained on YouTube tutorials, always make a backup of your theme (Online Store > Themes > Actions > Duplicate) before working in the code.
How to add an "Order Number" field: Go to Online Store > Themes > Actions > Edit code. Search in the `Sections` or `Templates` folder for the file `contact-form.liquid` or `page.contact.liquid`. According to kahunam.com and accentuate.io, you should find the spot between `{% form 'contact' %}` and `{% endform %}`.
Add the following code to create a text field:
```html <div class="field"> <label for="ContactForm-OrderNumber">Order Number</label> <input type="text" id="ContactForm-OrderNumber" name="contact[Order Number]" placeholder="e.g., #1001"> </div> ```
Important: The attribute `name="contact[YourFieldName]"` is crucial. Everything in the square brackets will be displayed to you as a label in the email.
Part 3: The Contact Form Problem – The "Waiting Trap"
Now you have a functioning form. Technically, everything is correct. But from a business perspective, you're at risk of leaving revenue on the table. Understanding why AI eliminates waiting times becomes critical at this point.
Why Contact Forms Can Be Conversion Killers
Imagine you sell high-quality bicycle accessories. A visitor is on your site, ready to buy, but uncertain: "Does this saddle fit my 2021 model?" They click on "Contact." They fill out the form. They click "Send." And then? Silence.
Time businesses take to respond to a web lead according to industry research
Decrease in qualification probability when responding after 30 minutes vs. within 5 minutes
Potential conversion rate boost with sub-1-minute response times
The data from kixie.com and salesso.com is sobering: The probability of qualifying a lead drops by 21 times if you respond after 30 minutes instead of within 5 minutes. This is what we call the 5-Minute Rule. Combined with the Amazon Effect—customers are accustomed to instant answers—making them wait means they'll find the answer (and the product) elsewhere.
The contact form is perfect for asynchronous communication (things that can wait, like return labels or partnership inquiries). However, it's deadly for synchronous needs (purchase decisions). This is where AI chatbots for marketing offer a compelling alternative.
Support vs. Sales: A Critical Distinction
You need to divide your incoming inquiries into two categories:
- Support (Ticket): "My package arrived damaged." → Here the form is fine. The customer has already purchased; they're waiting for a solution.
- Sales (Consultation): "Which size do I need?" → Here the form is an obstacle. The customer wants to buy but is being slowed down by the form.
Part 4: The Modern Alternative – Instant Consultation
To close the gap between "customer has a question" and "customer buys," a form isn't enough. You need a Zero-Latency solution (zero delay). This is where the AI selling revolution comes into play.
AI Product Consultation vs. Basic Chatbots
Many merchants shy away from chatbots because they think of those annoying popups that only respond with "Here's our FAQ." Modern AI solutions, however, are product consultants. For a comprehensive understanding, exploring AI product consultation providers is highly recommended.
Imagine an AI that knows your entire product catalog, your descriptions, and your technical data sheets. When comparing a consultative AI approach, the difference becomes clear:
- Form Scenario: Customer asks about compatibility → Waits 24h → Answer via email.
- Simple Bot Scenario: "Here is our shipping policy."
- AI Consultant Scenario: Customer asks: "Is this cream suitable for eczema?" → AI analyzes ingredients → Responds in seconds: "Yes, this product contains no fragrance and is dermatologically tested for sensitive skin. Alternatively, we recommend Product Y."
Studies show that a response time of under 1 minute can increase the conversion rate by 391%. This is hardly achievable with human personnel (except in huge call centers), but it's standard for AI. Implementing AI chatbot integration can transform your contact page from a bottleneck into a sales accelerator.
Comparison: Which Tool for Which Purpose?
Here you can see at a glance why you probably need both: A form for service and AI for sales. This hybrid approach maximizes both customer satisfaction and conversion rates.
| Feature | Standard Shopify Form | Form Builder Apps | AI Product Consultant |
|---|---|---|---|
| Primary Purpose | Simple contact | Complex inquiries (uploads) | Sales consultation & instant help |
| Response Time | 24-48 hours (human) | 24-48 hours (human) | Instant (< 10 seconds) |
| Setup Effort | 5 minutes | 30-60 minutes | 15-30 minutes (data sync) |
| Cost | Free | $10 - $30/month | Variable (often ROI-positive) |
| Conversion Impact | Low (passive) | Medium (better UX) | Very High (active selling) |
| Best Use For | General questions | Complaints, B2B | Product questions, "Does this fit?" |
Transform your contact page into a revenue generator. Our AI product consultant answers customer questions instantly—24/7, in their language, with product expertise that converts browsers into buyers.
Start Your Free TrialPart 5: Strategic Customer Flow Optimization
You shouldn't delete your contact form. You should direct traffic. An intelligent "help center" guides the customer before they type. Understanding how AI customer service automation works helps you design this optimal flow.
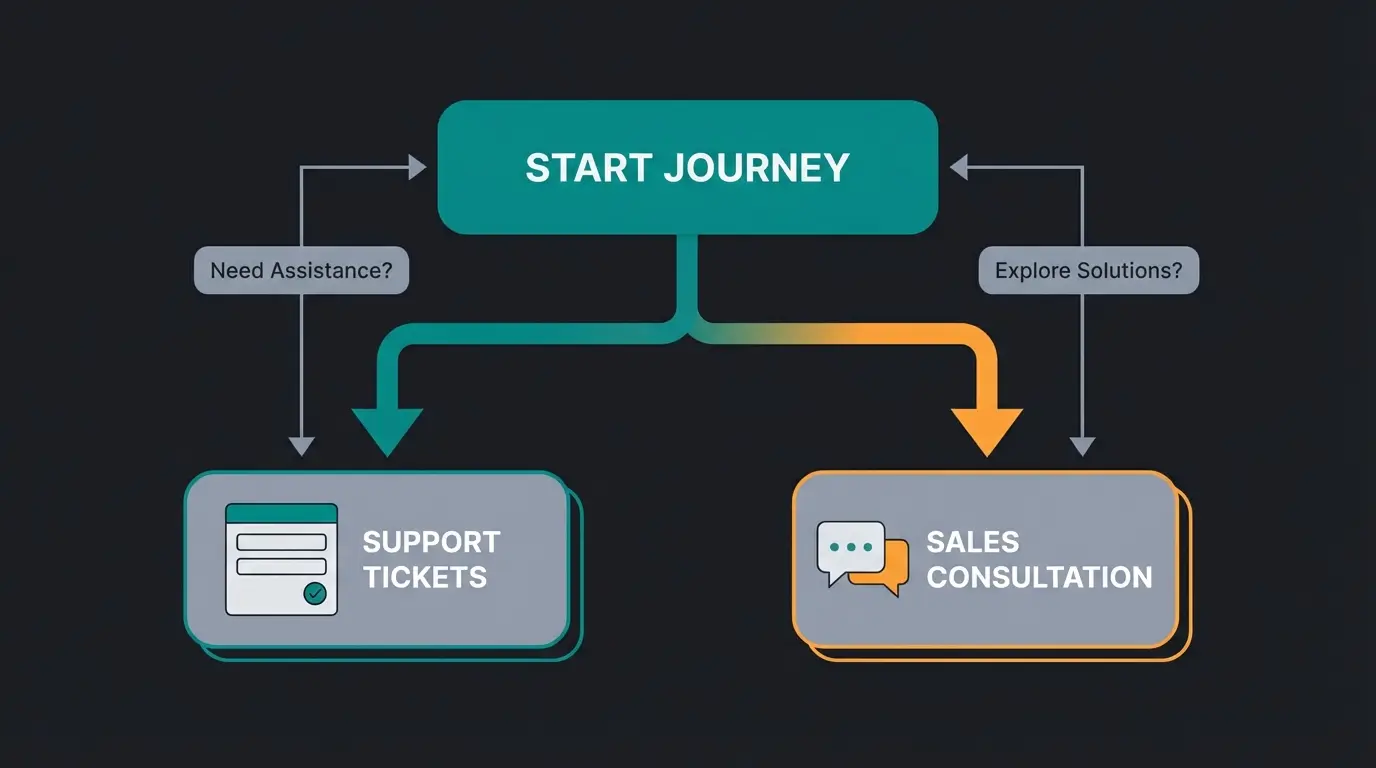
Envision the following structure on your contact page (or visualize this as a decision tree):
Visitor arrives seeking help or information about products
Present clear options to route the customer appropriately
Show the Shopify contact form (or app with file upload for defects). Waiting time is acceptable here.
Open the AI chat / live chat. The question gets answered immediately, the customer stays in 'buying mode' and completes the purchase.
By making this separation, you relieve your email inbox of trivial product questions (which the AI solves) and have more time for complex support cases in the form. This is how AI digital expert consultants create value—not by replacing human interaction, but by handling routine inquiries so your team can focus on what matters.
Part 6: Legal Compliance (GDPR & Privacy)
Operating a Shopify contact form in Europe brings legal hurdles that are often ignored in US tutorials. Here are the most important points for compliance-conscious stores.
1. The Checkbox Requirement (Consent)
There's often confusion about whether a checkbox ("I agree to the privacy policy") under the form is mandatory. According to frame-for-business.de and webcellent.com, under current interpretation (GDPR Art. 6 & Art. 13), a mandatory checkbox for pure contact inquiries is not always strictly required, as long as the form text transparently references the privacy policy.
However: As soon as you want to use the data for marketing (newsletter, SMS) or request particularly sensitive data, an active, non-pre-checked checkbox (opt-in) is mandatory. As Shopify's compliance documentation notes, this applies to all stores serving EU customers.
Recommendation: For safety and transparency, include a checkbox anyway. It builds trust and protects you legally.
GDPR-Compliant Checkbox Code Snippet (Liquid)
Add this before the "Submit" button in your `contact-form.liquid`:
```html <div class="field"> <input type="checkbox" id="contact_privacy" name="contact[privacy]" required> <label for="contact_privacy"> I have read the <a href="/policies/privacy-policy">Privacy Policy</a>.* </label> </div> ```
The `required` attribute prevents submission without checking the box. As websensepro.com explains, this simple addition provides significant legal protection.
2. Data Minimization
Only ask for what you really need. Is the phone number absolutely necessary for an email inquiry? If not, make it optional or remove the field. Required fields must be clearly marked (usually with an asterisk *). According to michaelaplatte.de, this principle of data minimization is fundamental to GDPR compliance.
3. Server Location & Data Processing
Shopify hosts data primarily in the cloud. For EU merchants, data flows often run through Irish subsidiaries, but data transfers to the USA (parent company) do occur. Since the "Privacy Shield" was invalidated, Shopify relies on Standard Contractual Clauses (SCCs).
To-Do: Ensure that you name Shopify as a data processor in your privacy policy and reference the corresponding risks/guarantees. As documented by mstage.at, eshop-guide.de, and globeriadatenschutz.de, this transparency is legally required for EU-based operations.
4. Legal Notice Requirement
The contact form does not replace the legal notice (Imprint). The legal notice must be reachable from every page (including the contact form) within a maximum of two clicks. A link in the footer is usually sufficient, but an explicit link in the text area of the contact page doesn't hurt.

Conclusion: The Contact Form Is Just the Beginning
Setting up a Shopify contact form is a matter of minutes thanks to `page.contact` and various apps. It's the foundation for accessibility and trust. But if you want to scale your store, you can't rely solely on this static tool. The analysis of response times clearly shows: Those who make customers wait, lose them.
The emerging WhatsApp bot AI revolution in e-commerce demonstrates that customers increasingly expect instant, conversational interactions across all channels—not just email forms.
Your strategy for 2025 should therefore be:
- Foundation: A clean, GDPR-compliant contact form for support, returns, and complex inquiries.
- Upgrade: Use apps like HulkApps or Pify when you need to structurally query specific data (photos, order numbers).
- Acceleration: Integrate an AI solution or live chat for product questions to bypass the "waiting trap" and immediately convert visitors into buyers.
Start today by viewing your contact page not as a "mailbox" but as a "reception hall." Direct the customer to where they can be helped fastest—whether that's the form or the intelligent consultant.
Frequently Asked Questions
Go to Online Store > Pages > Add page in your Shopify admin. Give it a title like "Contact," then in the Theme template dropdown on the right, select "contact." Save the page and add it to your navigation. The standard form includes Name, Email, Phone, and Message fields.
HulkApps Form Builder is highly recommended for file uploads. It offers conditional logic, Google reCAPTCHA integration, and deep customization options. Pify Form Builder is a strong alternative with pre-built templates for returns and wholesale inquiries.
The most common issue is not selecting the correct template. When editing your contact page, make sure to change the Theme template dropdown from "Default page" to "contact." Without this selection, only your text will display—no form fields.
Edit your theme code under Online Store > Themes > Actions > Edit code. Find the contact-form.liquid file and add input fields between the form tags. Use the format name="contact[YourFieldName]" to ensure the data appears in notification emails.
For pure contact inquiries, a mandatory checkbox isn't always strictly required if you transparently reference your privacy policy in the form text. However, if you use the data for marketing or collect sensitive information, an active opt-in checkbox is mandatory. For safety, always include one.
Stop losing sales to slow response times. Our AI-powered product consultant provides instant, accurate answers to customer questions—turning your contact page from a bottleneck into your most powerful conversion tool.
Get Started Free Today