Shopware Tutorial: The Complete Step-by-Step Guide for Beginners and Beyond
Master Shopware 6 with tutorials on installation, products, design, plugins, and SEO. Role-based paths for shop owners, marketers, and developers.

Shopware tutorial overview: what you will learn
This guide covers every core area of Shopware 6 in a single, structured resource. Whether you are a shop owner launching your first store, a marketer customizing landing pages, or a developer building plugins, you will find a tutorial path that fits your role.
Every section includes a difficulty level and a time estimate. The order follows the natural setup flow: install first, add products, customize the design, extend with plugins, then optimize for search engines. You can also jump directly to the section you need using the headings below.
| Tutorial | Difficulty | Time Estimate | Best For |
|---|---|---|---|
| Installation and setup | Beginner | 10-30 min | Everyone |
| Product management | Beginner | 20-40 min | Shop owners, marketers |
| Design and CMS | Beginner to Intermediate | 30-60 min | Marketers, designers |
| Plugin development | Advanced | 60-120 min | Developers |
| SEO optimization | Intermediate | 20-40 min | Marketers, shop owners |
If you are completely new to Shopware, start with the Shopware Training overview to understand the broader learning ecosystem. Then come back here for the hands-on work.
Shopware installation tutorial: step-by-step setup
Before you can do anything in Shopware 6, you need a running instance. There are two paths: Shopware Cloud (hosted by Shopware, no server management) and self-hosted (you manage the server yourself). The right choice depends on your technical resources and budget.
System requirements for self-hosted Shopware 6
Shopware 6.6+ requires PHP 8.2 or higher, MySQL 8.0+ or MariaDB 10.11+, and a Unix-based operating system (Windows is only supported via WSL 2 or Docker). Your server needs at least 512 MB memory_limit, though 1024 MB is recommended for stores with large product catalogs or heavy import processes.
Required PHP extensions include: ctype, curl, dom, fileinfo, gd, iconv, intl, json, mbstring, openssl, pdo_mysql, simplexml, xml, zip, and zlib. Most managed hosting providers have these pre-installed, but verify before starting.
Installation steps
- Download Shopware 6 from the official Shopware website. Choose the installer package for self-hosted or sign up for Shopware Cloud.
- Upload files to your web server via FTP or SSH. Extract the archive into your web root directory.
- Run the installer by navigating to your domain in a browser. The setup wizard checks system requirements automatically.
- Configure database connection. Enter your MySQL credentials. The installer creates all required tables.
- Set admin credentials. Choose a strong password for the admin panel.
- Complete setup and log into the Administration panel at `your-domain.com/admin`.
One common issue: if the installer reports missing PHP extensions, contact your hosting provider or install them via your server's package manager (`apt install php8.2-intl php8.2-gd` on Debian/Ubuntu).
Cloud vs self-hosted: which to choose
Shopware Cloud handles hosting, updates, and security patches automatically. You trade server control for convenience. Self-hosted gives you full control over performance tuning, custom server configurations, and plugin freedom, but you are responsible for maintenance and security.
For most SMEs launching their first store, Cloud is the faster path. If you have a developer on your team or plan to build custom plugins, self-hosted is the better foundation. The Shopware Getting Started Guide covers first steps after installation in more detail.
Shopware product tutorial: add your first products
Products are the core of any store. Shopware 6 organizes products through categories, properties (like color or size), and variants. Understanding this structure before adding your first product saves hours of rework later.
Creating product categories
Navigate to Catalogues > Categories in the admin panel. Start with your main category structure: Home & Garden, Electronics, Clothing, whatever fits your catalog. Shopware supports unlimited nesting, but keep it to three levels maximum for clean navigation and SEO.
Each category can have its own layout (via Shopping Experiences), SEO metadata, and product sorting rules. Set the most important categories first, then assign products to them.
Adding products with images and pricing
- Go to Catalogues > Products > Add product.
- Enter the product name, product number, and tax rate.
- Set the gross price. Shopware calculates net automatically based on the tax rate.
- Upload product images. The first image becomes the cover. Drag to reorder.
- Write a product description. Use the rich text editor for formatting.
- Assign the product to one or more categories.
- Set stock levels if you use inventory tracking.
- Click Save.
Working with variants and properties
If your product comes in multiple sizes or colors, use variants instead of creating separate products. First, define properties under Catalogues > Properties (e.g., Size with values S, M, L, XL). Then, in the product editor, go to the Variants tab and select which properties apply.
Shopware generates all possible combinations automatically. You can then set individual prices, stock levels, and images for each variant. For stores with hundreds of products, use the Import/Export module under Settings > Shop > Import/Export to manage everything via CSV.
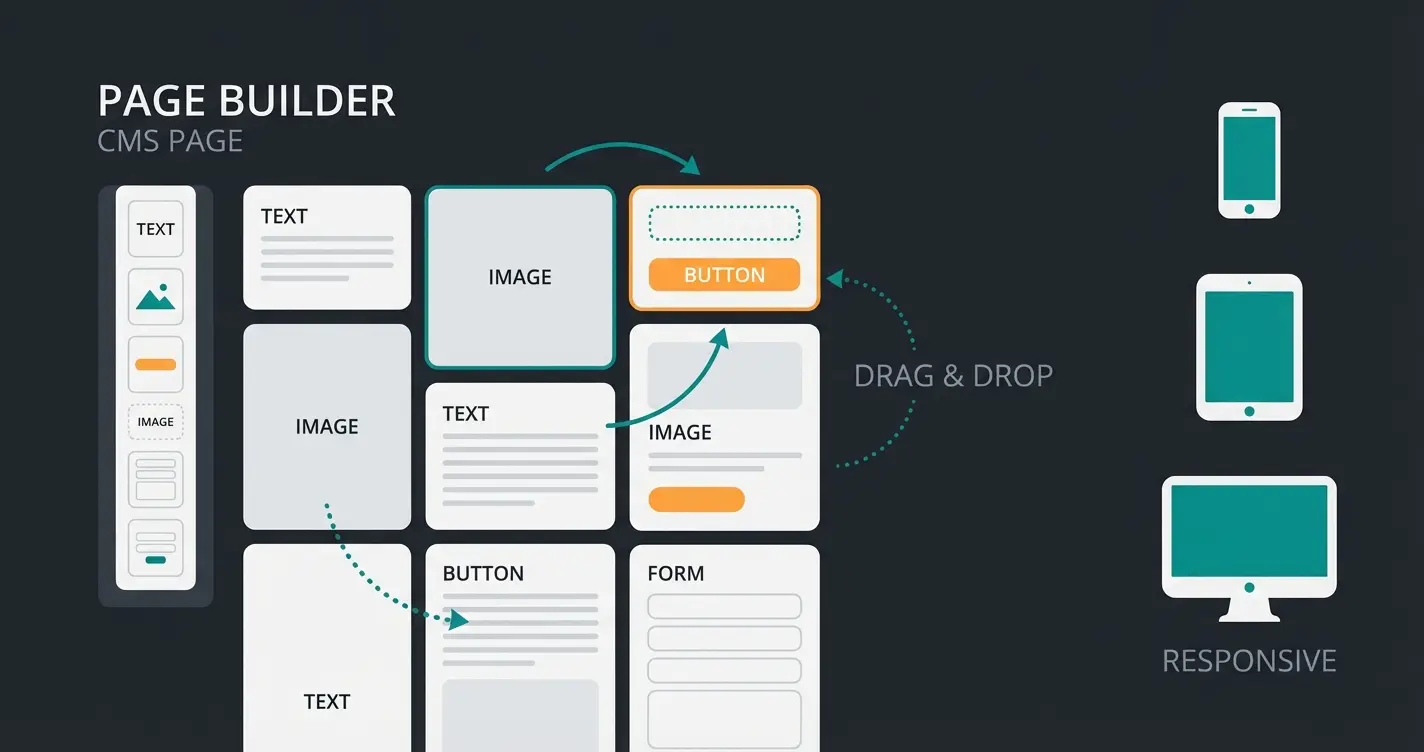
Shopware design tutorial: customize your store
Shopware 6 replaced the old "Shopping Worlds" from Shopware 5 with a far more powerful system called Shopping Experiences. Think of it as a built-in page builder that lets you design category pages, landing pages, and product detail pages without writing a single line of code.
Shopping Experiences (CMS) explained
Navigate to Content > Shopping Experiences in the admin. The system is built on three layers: sections (full-width rows), blocks (grouped elements within a section), and elements (individual content pieces like images, text, or product listings).
To create a new layout, click Create new layout and choose a type: Landing Page, Listing Page, or Product Page. Each type has different default blocks. Drag blocks from the sidebar into your layout, then click on each element to configure it.
Theme selection and customization
Shopware ships with a default theme that you can customize under Content > Themes. Change colors, fonts, logos, and layout spacing without touching code. For deeper changes, the theme system supports SCSS overrides and custom templates.
If the default theme does not match your brand, the Shopware Store offers hundreds of premium themes. Before purchasing, check that the theme supports Shopware 6.6+ and is compatible with your edition.
Mobile responsiveness checks
Every Shopping Experience layout includes device-specific visibility settings. You can hide or show individual blocks and sections for desktop, tablet, or mobile. Use the preview function in the layout editor to test each viewport before publishing.
A common mistake: building elaborate desktop layouts that break on mobile. Design mobile-first. Start with the smallest viewport and add complexity for larger screens.
Shopware plugin tutorial: build your first extension
Plugins are how you extend Shopware beyond its core functionality. Whether you need a custom payment gateway, a product recommendation engine, or a specialized import tool, the plugin architecture makes it possible. This section walks through building a basic plugin from scratch.
Plugin architecture overview
Shopware 6 is built on Symfony and Vue.js. Plugins hook into this architecture through a defined structure: a main plugin class extending `Shopware\Core\Framework\Plugin`, a `composer.json` declaring the plugin metadata, and optional service definitions, event subscribers, and admin modules.
Every plugin lives in the `custom/plugins/` directory. The naming convention is strict: UpperCamelCase, prefixed with your vendor name (e.g., `QualimeroProductAdvisor`). This prefix is mandatory if you plan to publish on the Shopware Developer Documentation store.
Creating a basic plugin step by step
- Scaffold the plugin using the CLI: `bin/console plugin:create YourVendorPluginName`. This generates the directory structure, main class, and composer.json automatically.
- Edit composer.json to add your plugin description, version, and Shopware compatibility range.
- Register the plugin with Shopware: `bin/console plugin:refresh`.
- Install and activate: `bin/console plugin:install YourVendorPluginName --activate`.
- Add functionality by creating service classes, event subscribers, or custom entities in your plugin's `src/` directory.
- Test in the admin by clearing the cache: `bin/console cache:clear` and verifying your plugin appears under Extensions > My Extensions.
<?php declare(strict_types=1);

namespace YourVendor\YourPlugin;

use Shopware\Core\Framework\Plugin;

class YourPlugin extends Plugin
{
    // Plugin lifecycle hooks
    // install(), update(), uninstall(), activate(), deactivate()
}
The CLI method prevents the most common beginner mistake: incorrect directory structure. If you create the structure manually, one misplaced folder means Shopware will not detect the plugin at all.
For the Shopware Community Edition, plugins are one of the primary ways to add features that paid editions include natively. The community plugin ecosystem is large, but quality varies. Always check reviews and update frequency before installing third-party plugins.
Shopware SEO tutorial: optimize for search engines
Shopware 6 includes solid SEO foundations out of the box: clean URL structures, automatic sitemap generation, and built-in meta tag fields. But the defaults alone will not get you to page one. This section covers the settings that actually move rankings.
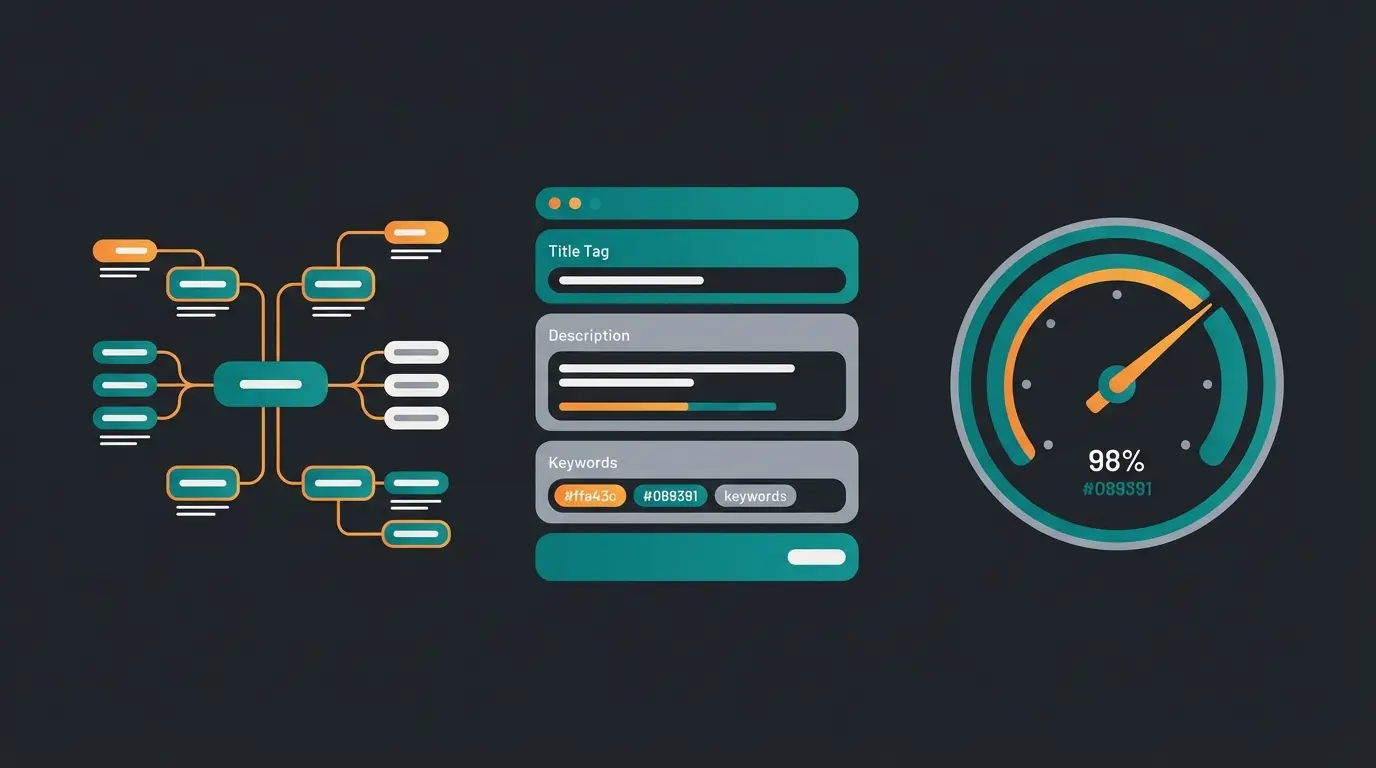
Meta titles and descriptions
Every product, category, and CMS page in Shopware has fields for meta title and meta description. The meta title should be under 60 characters and include your primary keyword. The meta description should be 145-160 characters, written as a compelling summary that earns the click.
Shopware also supports SEO URL templates. Under Settings > Shop > SEO, you can define patterns like `{product.name}/{product.productNumber}` to automatically generate clean URLs for all products. Avoid changing URL patterns on a live store without setting up 301 redirects.
Sitemap configuration
Navigate to Settings > Shop > Sitemap. Set the generation mode to Scheduled so the sitemap updates automatically. The default refresh interval is 3600 seconds (1 hour), but for most stores, 86,400 seconds (24 hours) is sufficient and reduces unnecessary server load.
Submit your sitemap URL (`your-domain.com/sitemap.xml`) to Google Search Console and Bing Webmaster Tools. This ensures search engines discover new products and categories quickly.
Performance and Core Web Vitals
Page speed is a ranking factor. Shopware 6 supports HTTP/2, lazy loading for images, and built-in caching. Enable the HTTP cache under Settings > System > Caches & Indexes and configure your CDN for static assets.
For stores with consultation-heavy product catalogs, page speed alone does not convert visitors into buyers. A Shopware store that loads fast but cannot answer product questions still loses sales. That is exactly where AI-powered product advisory comes in: a KI-Mitarbeiter handles real-time product recommendations, reducing bounce rates and increasing average cart values by up to 35%.
Where to find more Shopware tutorials
This guide covers the essentials, but Shopware is a deep platform. Here are the best resources for continued learning, each serving a different depth level.
- [Official Shopware Tutorials & FAQ](https://docs.shopware.com/en/shopware-6-en/tutorials-and-faq): The canonical reference for all admin-level features. Comprehensive but written in documentation style, not tutorial format.
- [Shopware Developer Documentation](https://developer.shopware.com/): Essential for plugin and theme developers. Includes API references, extension guides, and architectural concepts.
- [Shopware Academy](/blog/shopware-academy): Structured courses from beginner to certification level. Best for systematic learners who want a guided path.
- Shopware Documentation: Our overview of the full documentation landscape, including community resources and video channels.
- Shopware Community Forum: Peer-to-peer support. Search existing threads before posting, as most beginner questions have been answered.
For Shopware shop owners specifically: the most common gap is not technical setup but customer conversion. Once your store is live and products are listed, the bottleneck shifts from "how do I configure this" to "how do I turn visitors into buyers." That transition is where most tutorial resources stop and real e-commerce strategy begins.
More traffic is only the first step. A KI-Mitarbeiter advises your customers in real time, recommends products, and increases cart values by up to 35%. Our clients see 7x higher conversion rates on average.
Book a free demoFrequently asked questions about Shopware tutorials
Shopware 6 is straightforward for basic store setup, product management, and design customization. The admin interface is intuitive, and most tasks require no coding. Plugin development and advanced theme customization require PHP and Symfony knowledge, which has a steeper learning curve.
Basic store management takes 1-2 days of focused learning. Building custom layouts with Shopping Experiences takes about a week. Plugin development proficiency requires 2-4 weeks, depending on your PHP and Symfony experience.
No, not for running a store. Product management, order processing, design customization, and SEO settings are all handled through the visual admin panel. Coding is only needed for custom plugins, theme modifications, or API integrations.
Start with the official Shopware Getting Started guide for initial setup. Then use this article's section-by-section structure to learn products, design, and SEO in order. For video learners, the Shopware YouTube channel offers walkthrough content.
The Community Edition is free for stores under EUR 1 million in gross merchandise volume (GMV). As of March 2025, Shopware's Fair Usage Policy requires stores exceeding EUR 1M GMV to upgrade to a paid plan starting at EUR 600 per month (Shopware Rise). This is a significant change from the previously unrestricted open-source model.
Setting up a Shopware store is the technical foundation. Converting visitors into customers is the business challenge. See how a KI-Mitarbeiter handles product advisory, answers customer questions 24/7, and drives measurable revenue growth.
See it in action
Lasse is CEO and co-founder of Qualimero. After completing his MBA at WHU and scaling a company to seven-figure revenue, he founded Qualimero to build AI-powered digital employees for e-commerce. His focus: helping businesses measurably improve customer interaction through intelligent automation.
