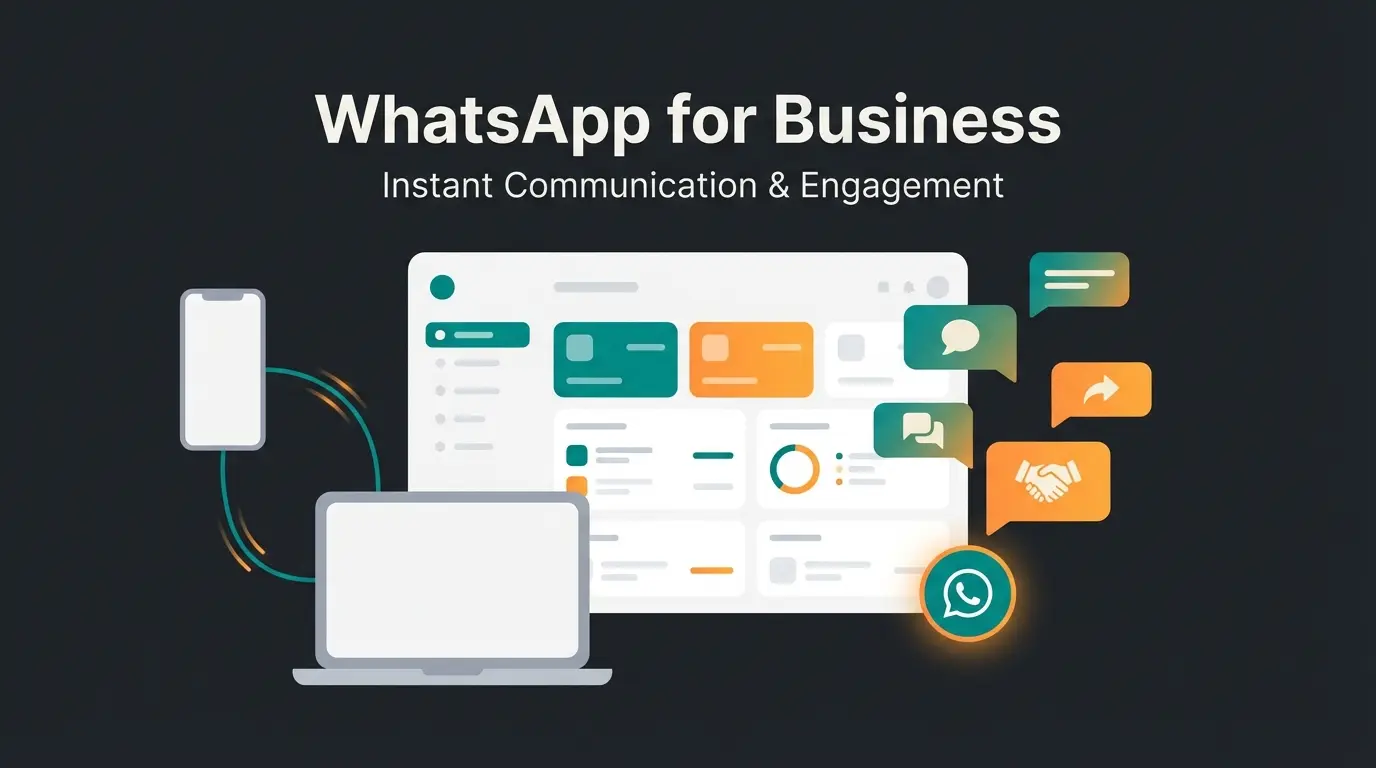
Why Most Businesses Use Intercom Completely Wrong
When you think of Intercom, you probably picture that small blue chat button in the bottom right corner of a website where frustrated customers ask about their order status. That's the classic use case: reactive support. However, in 2025, the game has fundamentally changed.
Through the integration of advanced AI (like the Fin AI Agent) and deeper connectivity with WordPress and WooCommerce, Intercom is no longer just a cost center for support—it's become a revenue driver for sales. The AI chatbots transforming e-commerce landscape proves that conversational AI is the future of customer engagement.
The problem? Most tutorials online are outdated. They show you how to install the plugin and then leave you alone—with a configuration that raises data protection concerns, a slower website, and a chatbot that doesn't sell. This guide is different.
We don't treat the Intercom WordPress plugin as a technical afterthought but as a strategic tool. We close the gaps that official documentation leaves open: How do you integrate it in a GDPR-compliant manner in Europe? How do you prevent it from destroying your PageSpeed? And how do you transform the chat into a 24/7 product consultant?

Installing the Intercom WordPress Plugin the Right Way
Installing Intercom on WordPress seems trivial at first glance but offers pitfalls that can become expensive later. There are essentially three ways to integrate Intercom, each with its own advantages and disadvantages. Understanding these methods is crucial before implementing AI-powered sales consultants on your platform.
Method A: The Official Intercom WordPress Plugin
This is the path of least resistance, but often not the most flexible option. Start by navigating to your WordPress Dashboard under Plugins > Install and search for "Intercom." Install the official plugin from Intercom, as documented on WordPress.org. Note that you need WordPress version 4.9.0 or higher for compatibility.
After activation, you'll find "Intercom" in your settings. Click "Connect with Intercom" and log into your Intercom workspace to confirm access. According to Intercom's documentation, make sure you're already logged into your Intercom account in the same browser to avoid authentication issues.
The plugin automatically retrieves your App ID. If the field remains empty, manually copy the ID from your Intercom URL (the string after /apps/ in your browser bar). Critical limitation: The official plugin loads the script on all pages. For simple support solutions, this is acceptable, but for performance-optimized sales funnels, it's often too inflexible.
Method B: Google Tag Manager for Performance Control
If you want full control over when and where the chat loads (for example, not on landing pages optimized purely for conversion), Google Tag Manager (GTM) is the better choice. Create a new tag of type "Custom HTML" in GTM and insert the Intercom installation snippet found in Intercom Settings under Installation > Web.
The key advantage: You can define triggers. For example, "Load chat only when the user has been on the page for more than 10 seconds" or "Load only on pages containing /shop/ in the URL." This level of control is essential when implementing AI product consultants that need to appear at strategic moments.
Method C: Manual Code Integration for Developers
For maximum performance and customization, you can insert the code directly into your child theme's header.php or footer.php. This allows you to use PHP logic to differentiate between user types:
Using conditional PHP code, you can implement different tracking approaches for logged-in users versus visitors. For logged-in users, you pass user data while limiting tracking for anonymous visitors. This distinction is crucial because Intercom often charges based on "Seats" or active users. If you track every random blog reader as a "User," you dilute your data and potentially increase complexity.
Quickest setup, loads on all pages, limited control over placement and timing
Full trigger control, better performance optimization, requires GTM setup
Maximum customization, PHP conditional logic, developer expertise required
The European Challenge: Intercom & GDPR Compliance
This is the section that most US-centric tutorials completely ignore. If you operate in Germany or the EU, you cannot simply run Intercom "out of the box." Intercom sets cookies and local storage to identify users across sessions, as noted in their privacy documentation. Additionally, data is processed on US servers by default.
The Intercom AI product consultant capabilities are impressive, but they must be implemented with European data protection laws in mind. This is where most implementations fail.
Step 1: Activate EU Data Hosting
Intercom now offers "Regional Data Hosting," meaning your data is stored on AWS servers in Dublin, Ireland (eu-west-1), according to Intercom's regional hosting documentation. This is a critical first step for GDPR compliance.
Important setup consideration: You cannot simply migrate an existing US workspace to Europe. You must create a new workspace hosted in the EU. When using EU hosting, the API endpoint changes in the JavaScript code. The official plugin usually recognizes this automatically when the workspace is correctly linked.
For manual integration, you must adjust the api_base parameter. Without this parameter set to https://api-iam.eu.intercom.io, requests will either fail or be incorrectly sent to US servers. This technical detail is often overlooked but is essential for compliance.
Step 2: Integrate Consent Management Tools
Loading the Intercom script before the user has consented is a GDPR violation since personal data (IP address) is transmitted. You must block the script until the "Accept" button in the cookie banner is clicked.
Borlabs Cookie is the most widely used consent management tool for WordPress in German-speaking countries, as confirmed by Lukas Fischer's analysis. Here's how to configure it properly:
- Go to Script Blocker in Borlabs and scan your page—it should recognize the Intercom JavaScript
- Under Cookies > Add New, create a new service called 'Intercom' with the category set to Marketing or Statistics
- Set the Provider as 'Intercom R&D Unlimited Company' and paste your Intercom start script in the Opt-in Code field
- Add 'window.Intercom(shutdown);' as the Opt-out Code to end the session when consent is withdrawn
- Link the Script Blocker with the Service so the chat button only appears after consent is given
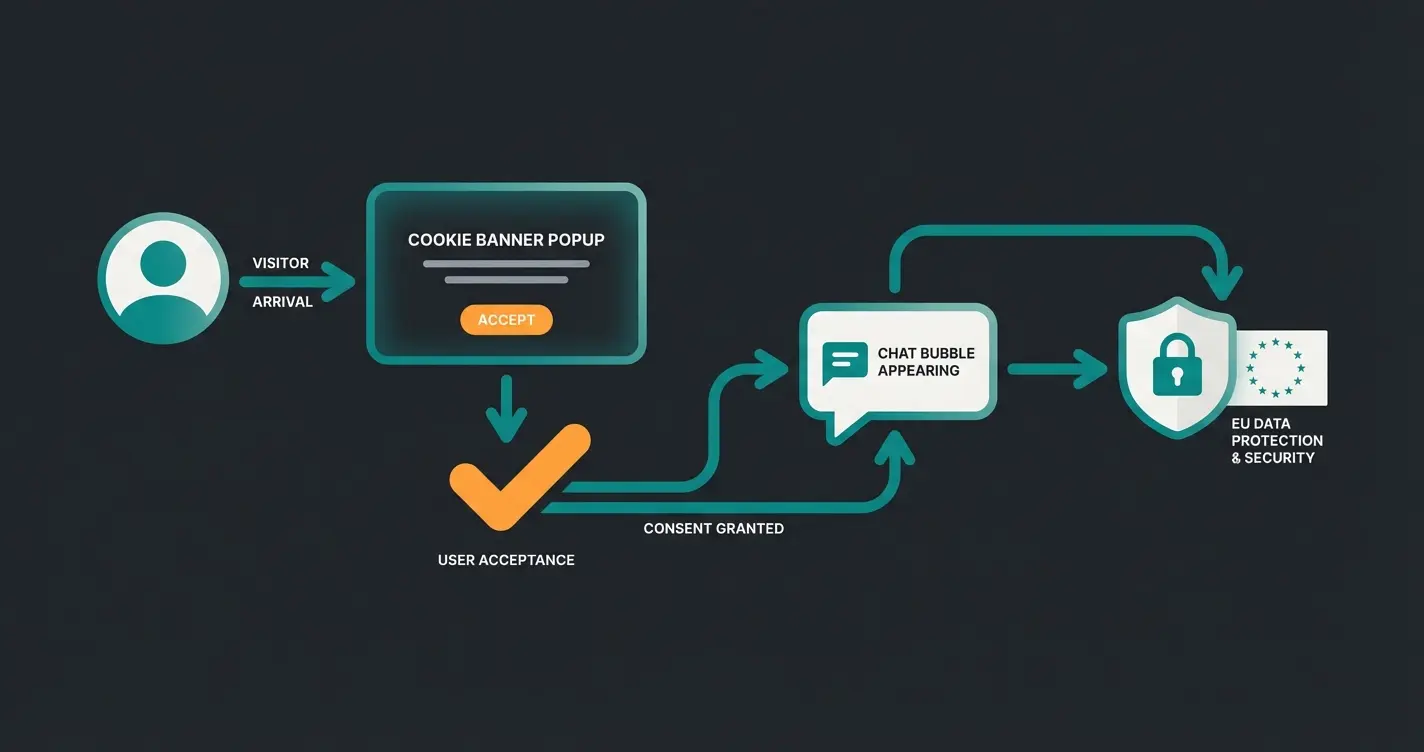
User lands on your WordPress site, Intercom script is blocked by default
Borlabs Cookie or similar tool shows consent options to the visitor
Visitor clicks accept for marketing/statistics cookies category
Consent triggers the loading of the Intercom JavaScript code
The Intercom widget becomes visible and functional for the user
From Support Bot to AI-Powered Sales Consultant
Most WordPress users install Intercom to reduce support tickets. That's defensive thinking. The offensive strategy uses Intercom to increase revenue. This is where the Fin AI Agent comes into play, and understanding the difference between AI Product Consultation approaches becomes crucial.
Standard Bot vs. Fin AI Agent: The Key Differences
The evolution from basic chatbots to intelligent AI consultants represents a fundamental shift in how e-commerce businesses can engage customers. Understanding these differences helps you make informed decisions about your implementation.
| Feature | Standard Intercom Bot (Workflows) | Fin AI Agent (2025) |
|---|---|---|
| Logic | Static decision tree (If A, then B) | Generative AI (LLM), understands context & nuances |
| Setup | Tedious path creation | Reads your website/documentation and learns independently |
| Goal | Navigation & FAQ answering | Problem-solving & active consultation |
| Cost | Included in subscription | Approximately $0.99 per resolved inquiry |
According to Intercom's pricing documentation and GPTBots analysis, the per-resolution pricing model of Fin AI makes it cost-effective for businesses focused on conversion rather than just deflection. The Consultative AI increases engagement significantly compared to traditional rule-based bots.
The Consultation Angle for WooCommerce Stores
Imagine you sell complex products (like camera equipment) through WooCommerce. Here's how to transform your chat into a sales powerhouse. First, synchronize data using plugins like Sync Engine for Intercom or WP Fusion to send WooCommerce data to Intercom.
Key attributes to sync include total_spend, last_order_date, and current_cart_contents. This enables personalized consultations based on customer behavior and purchase history. The AI product consultation success story demonstrates how this approach transforms customer interactions.
Instead of Fin just citing support articles, give it guidance for selling. Your system prompt might read: "You are an experienced camera consultant. When a customer asks about a lens, first ask about their current camera model and budget. Then recommend products from our catalog." This approach mirrors what the AI product consultation case study revealed about effective AI selling.
Discover how AI-powered product consultation can turn website visitors into paying customers 24/7—without adding staff.
Start Your Free TrialTroubleshooting and Performance Optimization
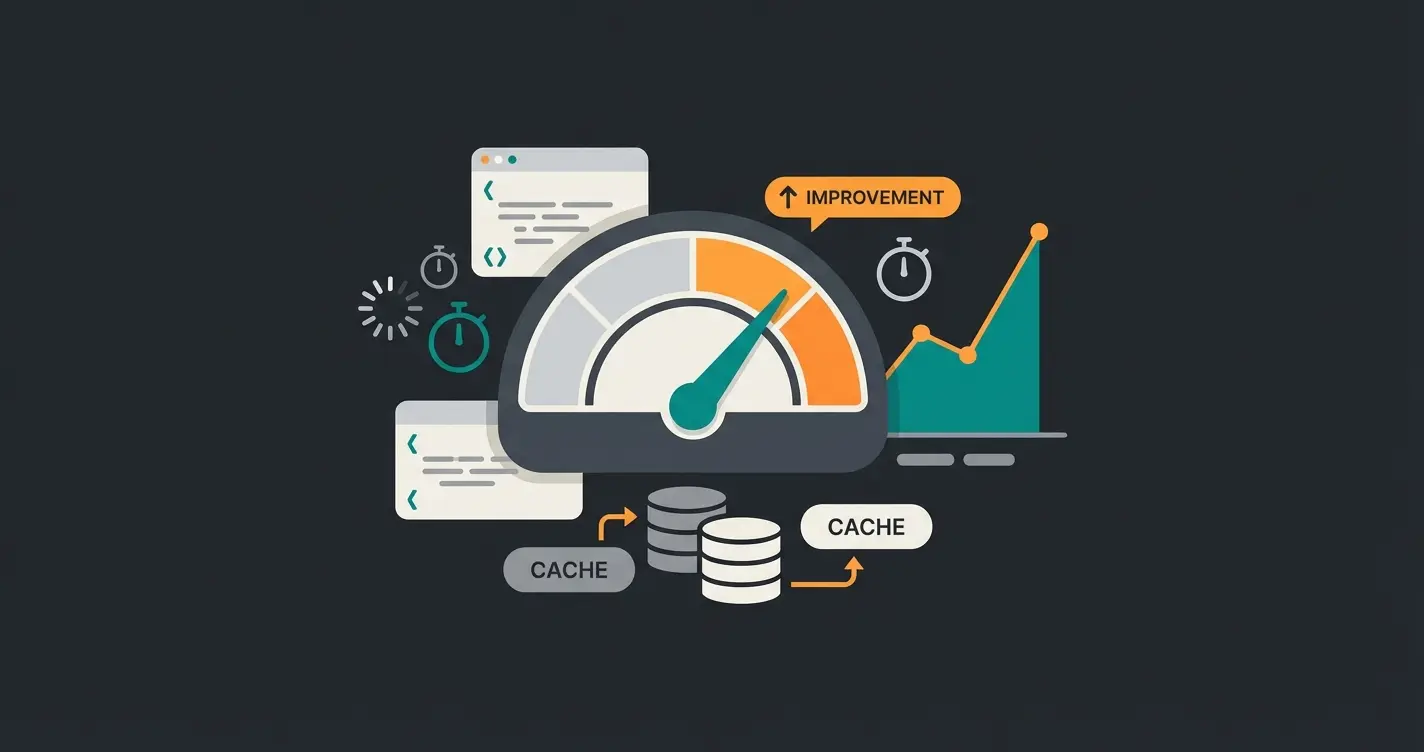
A common problem when using the intercom wordpress plugin is conflicts with caching and optimization plugins like WP Rocket or Autoptimize. Understanding these issues is essential for maintaining both functionality and site speed.
Problem 1: Chat Widget Not Displaying (Caching Issues)
Intercom uses dynamic JavaScript to recognize users. When WP Rocket statically caches the page and delivers it as HTML, the chat may display User A's session to User B (or not load at all) because the script was "frozen." This issue is documented in the WordPress plugin repository.
Solution approach: In WP Rocket settings, ensure logged-in WordPress users do not see the cached page (default setting: "Enable caching for logged-in WordPress users" → Deactivate). If using "Load JavaScript Deferred" or "Delay JavaScript Execution," you often need to exclude Intercom.
According to Blazeo's technical documentation, add intercom.io and widget.intercom.io to the exceptions in WP Rocket. This ensures the chat widget functions properly while maintaining cache benefits for other elements.
Problem 2: Core Web Vitals Impact (LCP & TBT)
Intercom is a powerful tool, but the JS bundle is large. It can negatively impact your "Total Blocking Time" (TBT) score. The "Zero-Impact" strategy involves loading Intercom not at page load but upon user interaction, as suggested in Intercom's optimization guides.
Use a "facade" script: Display only a lightweight SVG icon as a chat button. Only when the user hovers over the button or clicks does the heavy Intercom JS load. Implementing a delayed load with setTimeout (loading after 5 seconds, for example) massively improves PageSpeed scores since Google's bot usually doesn't wait 5 seconds.
Problem 3: Z-Index Conflicts on Mobile
The Intercom button often covers important elements on mobile devices (like the "Buy" button at the bottom of the screen). Intercom allows position adjustments in the dashboard. Alternatively, you can adjust the z-index via CSS or add padding-bottom to your mobile page to create space.
Potential Core Web Vitals impact without proper lazy loading implementation
Recommended setTimeout delay for lazy loading without affecting user experience
Maintain high cache efficiency by properly excluding Intercom from optimization
Comparison: Standard Intercom vs AI Product Consultant
Understanding the fundamental differences between traditional Intercom usage and advanced AI consultation helps clarify the opportunity. The comparison between Intercom vs Zendesk for product consultation reveals similar insights about leveraging AI for sales.
| Aspect | Standard Intercom Bot | AI Product Consultant |
|---|---|---|
| Primary Goal | Answer FAQs (Reactive) | Recommend Products (Proactive) |
| Data Used | Predefined responses | Product catalog, user behavior, purchase history |
| User Experience | Navigation and deflection | Guided consultation and personalization |
| Outcome | Ticket reduction | Revenue generation and conversion increase |
| Human Intervention | Required for complex queries | Only for edge cases |
This distinction matters because KI Produktberatung outperforms traditional support approaches in revenue metrics. The shift from cost center to profit center requires rethinking how you deploy conversational AI.
Advanced Configuration: Hidden Settings That Matter
Beyond basic installation, there are configuration options that significantly impact both performance and user experience. These "hidden settings" are often overlooked but can make the difference between a mediocre and exceptional implementation.
Exclude Paths Setting: Prevent the chat from loading on irrelevant pages like /privacy-policy/ or /imprint/. This improves site speed and focuses the chat where it matters. Configure this in the Intercom plugin settings or via GTM triggers.
Messenger Customization: Adjust colors, position, and greeting messages to match your brand. A consistent experience builds trust and encourages engagement. The AI chatbots marketing approach emphasizes brand consistency across all touchpoints.
Business Hours Configuration: Set specific hours when live agents are available versus AI-only mode. This manages customer expectations and ensures consistent service levels. The hybrid approach maximizes efficiency while maintaining quality.
Conclusion: Intercom Is What You Make of It
The Intercom WordPress plugin in 2025 is far more than a simple interface. It's the gateway to an AI-powered sales machine. The difference between success and mediocrity lies entirely in implementation strategy.
For beginners: Use the plugin but pay meticulous attention to GDPR settings (EU hosting + Borlabs consent management). Get the basics right before adding complexity.
For intermediate users: Use Google Tag Manager to protect performance while maintaining flexibility in chat placement and timing. This level of control separates amateur implementations from professional ones.
For advanced users: Connect WooCommerce data with the Fin AI Agent to turn visitors into customers before a human employee even needs to intervene. This is where the real competitive advantage lies.
The technology is available. Most competitors still use chatbots as glorified answering machines. Use this advantage and make your chat the best salesperson on the team.
Frequently Asked Questions
The plugin itself is free to download and install, but you need a paid Intercom subscription to use it. Pricing for AI features like Fin often comes additionally on a per-resolution basis, typically around $0.99 per successfully resolved inquiry.
Yes, absolutely. Since Intercom functions as an overlay on top of your page, it's independent of your page builder choice. Just ensure that Elementor popups don't conflict with the chat widget through z-index positioning issues.
With the standard plugin, this is difficult to achieve. However, through Google Tag Manager or manual code integration using WordPress conditional tags like is_checkout(), you have complete control over where the chat appears.
You need to take two critical steps: First, use Intercom's EU Data Hosting option by creating a new workspace hosted in Ireland. Second, integrate with a consent management tool like Borlabs Cookie to block the Intercom script until users explicitly consent.
Standard bots use static decision trees requiring manual path creation, while Fin AI uses generative AI that learns from your documentation and understands context. Fin can conduct genuine consultative conversations and recommend products, whereas standard bots primarily navigate users to answers.
Stop treating your chat as a support cost center. Transform it into your highest-performing sales channel with intelligent product consultation.
Get Started Today
Kevin is CTO and co-founder of Qualimero. As an AI architect with over 15 years of experience as CTO and CPO in the tech industry, he designs the AI systems that automate tens of thousands of customer interactions daily for Qualimero's clients — reliably, securely, and at scale.